Rabbit MQ is an amazing tool, as its a “messaging platform”, using the AMPQ protocol/standards.
It can do lots of cool tasks, that allow for distributing tasks and much more, but how to install and configure?
Lets start! We are using a Ubuntu 22.04 for our example, but its very compatible with any Linux version, as it really uses Erlang to run, something we will have to install along with it.
We will create a script to do the work for us a bit.
nano rabbitmq-server-install.sh
Then include the following content (copy/paste)
#!/bin/sh

sudo apt-get install curl gnupg apt-transport-https -y

## Team RabbitMQ's main signing key
curl -1sLf "https://keys.openpgp.org/vks/v1/by-fingerprint/0A9AF2115F4687BD29803A206B73A36E6026DFCA" | sudo gpg --dearmor | sudo tee /usr/share/keyrings/com.rabbitmq.team.gpg > /dev/null
## Community mirror of Cloudsmith: modern Erlang repository
curl -1sLf https://github.com/rabbitmq/signing-keys/releases/download/3.0/cloudsmith.rabbitmq-erlang.E495BB49CC4BBE5B.key | sudo gpg --dearmor | sudo tee /usr/share/keyrings/rabbitmq.E495BB49CC4BBE5B.gpg > /dev/null
## Community mirror of Cloudsmith: RabbitMQ repository
curl -1sLf https://github.com/rabbitmq/signing-keys/releases/download/3.0/cloudsmith.rabbitmq-server.9F4587F226208342.key | sudo gpg --dearmor | sudo tee /usr/share/keyrings/rabbitmq.9F4587F226208342.gpg > /dev/null

## Add apt repositories maintained by Team RabbitMQ
sudo tee /etc/apt/sources.list.d/rabbitmq.list <<EOF
## Provides modern Erlang/OTP releases
##
deb [signed-by=/usr/share/keyrings/rabbitmq.E495BB49CC4BBE5B.gpg] https://ppa1.novemberain.com/rabbitmq/rabbitmq-erlang/deb/ubuntu jammy main
deb-src [signed-by=/usr/share/keyrings/rabbitmq.E495BB49CC4BBE5B.gpg] https://ppa1.novemberain.com/rabbitmq/rabbitmq-erlang/deb/ubuntu jammy main

# another mirror for redundancy
deb [signed-by=/usr/share/keyrings/rabbitmq.E495BB49CC4BBE5B.gpg] https://ppa2.novemberain.com/rabbitmq/rabbitmq-erlang/deb/ubuntu jammy main
deb-src [signed-by=/usr/share/keyrings/rabbitmq.E495BB49CC4BBE5B.gpg] https://ppa2.novemberain.com/rabbitmq/rabbitmq-erlang/deb/ubuntu jammy main

## Provides RabbitMQ
##
deb [signed-by=/usr/share/keyrings/rabbitmq.9F4587F226208342.gpg] https://ppa1.novemberain.com/rabbitmq/rabbitmq-server/deb/ubuntu jammy main
deb-src [signed-by=/usr/share/keyrings/rabbitmq.9F4587F226208342.gpg] https://ppa1.novemberain.com/rabbitmq/rabbitmq-server/deb/ubuntu jammy main

# another mirror for redundancy
deb [signed-by=/usr/share/keyrings/rabbitmq.9F4587F226208342.gpg] https://ppa2.novemberain.com/rabbitmq/rabbitmq-server/deb/ubuntu jammy main
deb-src [signed-by=/usr/share/keyrings/rabbitmq.9F4587F226208342.gpg] https://ppa2.novemberain.com/rabbitmq/rabbitmq-server/deb/ubuntu jammy main
EOF

## Update package indices
sudo apt-get update -y

## Install Erlang packages
sudo apt-get install -y erlang-base \
                        erlang-asn1 erlang-crypto erlang-eldap erlang-ftp erlang-inets \
                        erlang-mnesia erlang-os-mon erlang-parsetools erlang-public-key \
                        erlang-runtime-tools erlang-snmp erlang-ssl \
                        erlang-syntax-tools erlang-tftp erlang-tools erlang-xmerl

## Install rabbitmq-server and its dependencies
sudo apt-get install rabbitmq-server -y --fix-missing
Then we can execute that
bash ./rabbitmq-server-install.sh

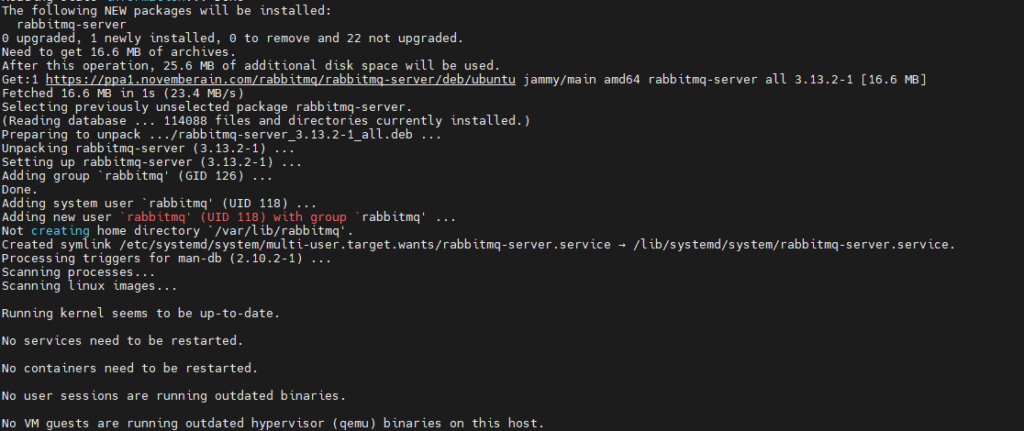
The above just shows the ending, as lots of activity will occur 🙂
The script would have also started running RabbitMQ Server so we should be able to see that with the following command
sudo systemctl status rabbitmq-server.service
And should show like this

We now are going to want to enable the management plugins
sudo rabbitmq-plugins enable rabbitmq_management
This will open another port, besides the default (5672) for RMQ services, 15762, which can be reached in your browser to access the GUI for your RMQ service. The output will show like so:

We also want to cleanup some setup data, and make sure we have a user with permission to access and manage the service.
We start to delete the guest account
sudo rabbitmqctl delete_user guest
Then we make sure we have a proper root vhost /
sudo rabbitmqctl add_vhost /
Now lets add a user for ourselves (outinthecloud with password YourP@ssword):
sudo rabbitmqctl add_user 'outinthecloud' 'YourP@ssword'
And lets give this user permission on the main Vhost at least /
sudo rabbitmqctl set_user_tags outinthecloud administrator
Lastly, for our user, we have to make it an adminstrator so we can access the controls.
sudo rabbitmqctl set_permissions -p "/" "outinthecloud" ".*" ".*" ".*"
That was that, we are ready to confirm, lets open a browser on our
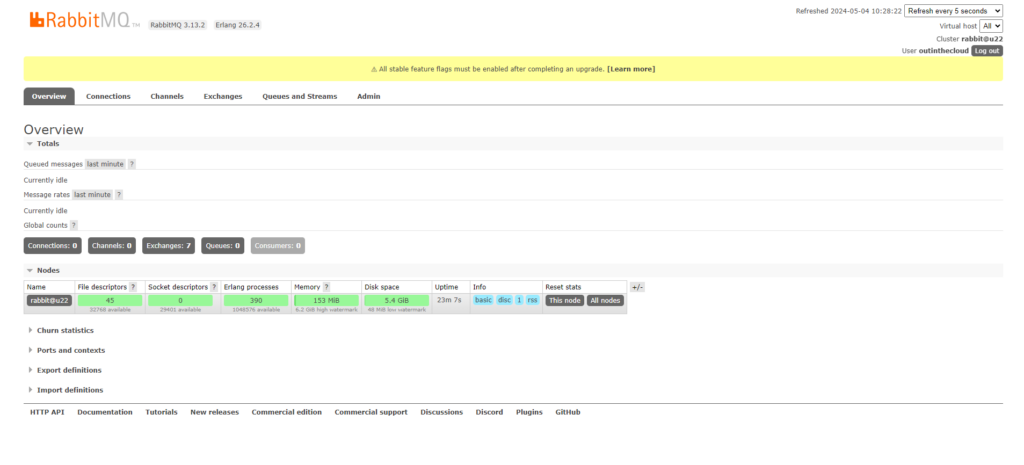
http://SERVER_IP:15672This should give a page showing

Where we can use our username and password to login. And once we are logged in we can see

This means you are ready to AMPQ!

Leave a Reply